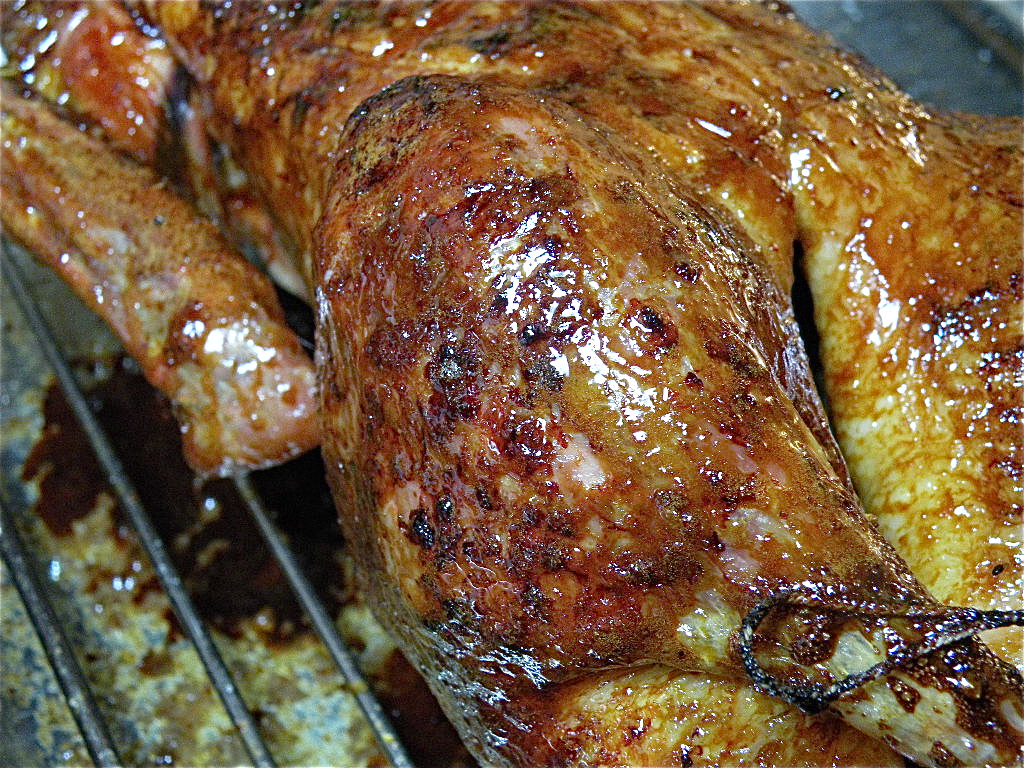
For a truly sophisticated meal, it is hard to surpass the remarkable flavor of duck. And contrary to popular belief, duck meat (without the skin) has no more fat than chicken and even less fat than turkey. In fact, chicken and turkey contain a higher amount of polyunsaturated fats. It's so low in saturated fat that it’s actually liquid at room temperature (76°).
When cooking duck you should plan for 1½ - 2 pounds per person (roughly a breast & leg per person). It's important to remember that since ducks are water birds, they have a layer of fat beneath the skin on their belly to keep them buoyant. Until this fat has melted the duck isn’t done, so in order to render the fat you need to prick the skin with a fork all over before cooking so the fat can melt and leave behind crispy skin. Unlike beef, duck fat isn’t marbled, it is a layer that covers the muscle, and so it is easily removed if you are using pieces.
Don’t overcook waterfowl breasts or they will be livery. Rare-to-medium is the mantra. As for the legs, thighs and wings, slow cook them to make them tender.
A note on all recipes: it is vital that you remove ALL of the body cavity fat and then prick the skin all around with the point of a filet knife or something else narrow and pointy (or see below "how to score & render)". If you're cooking one of my ducks there won't be any body cavity fat or tail to worry about since I remove it prior to packaging.
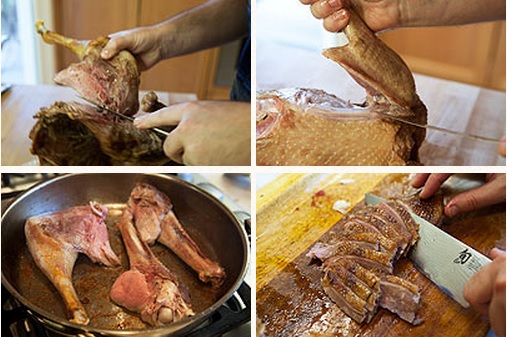
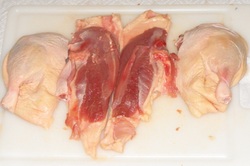
How to quarter a duck
How to score & render a duck breast
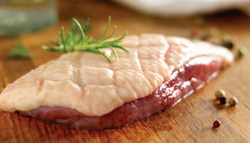
A guided instruction for scoring and rendering a duck breast. Print it, save it, use it often.
The secret to having crispy duck breast skin is to score the skin and sauté the breast on its skin side over low heat, so the fat has a chance to render or melt out of the skin. By properly cooking duck, you can eliminate 70% of the fat, which leaves a delicious, crisp skin that adds to the distinct favor of the meat.
How to Sear Duck Breast
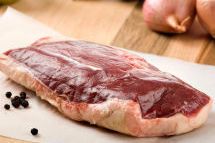
With much thanks the Hank Shaw, here's a step-by-step photo tour for searing duck breast.
Be forewarned that simply looking will make you hungry! You may also want to check out his cookbook Hunt Gather Cook.
_What To Do With The Rendered Duck Fat
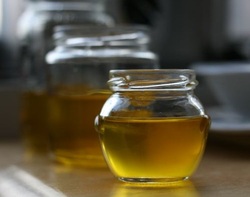
_Duck fat keeps for months in the fridge. Use it much in the same way you
would use rendered bacon fat. Its high flash point and lower
cholesterol make it more versatile than simple butter or other cooking
fats. Here are some ideas:
o Duck fat is a glorious companion to potatoes. Make some duck-fat hash browns. Add duck fat to mashed potatoes instead of butter. Oh! and it makes the best french fries ever!
o Rub a whole chicken’s skin with it before roasting. It’ll add a good, deep flavor to your bird.
o Slather it on root veggies and roast with garlic, salt, and pepper. There's also nothing better for caramelizing onions. And in Russia it's used it to saute cabbage with a little sliced onion mixed in inmmmmmm...
o Popping popcorn: just sprinkle with sea salt; no need to even drizzle with melted butter.
o You can mix duck fat with blanched pounded garlic. It is known as Gascony butter and is used to flavor soups and cassoulet and can be spread onto croutons. A wonderful replacement for butter in savory pastries
o Mediterranean style vegetables such as peppers, eggplant and zucchini will take on a whole new flavor when roasted or grilled with duck fat and garlic cloves.
.
Whole Roasted Goose
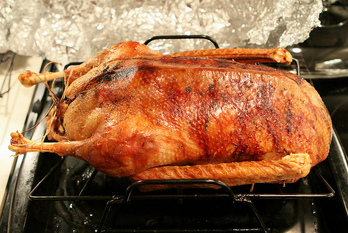
Prep time: 35 minutes | Cook time: 1 hour, 30 minutes
Preheat the oven to 375 degrees F.
With Hank Shaw's method, you roast the goose for a while, then slice off the whole breast and finish it in a pan, skin side down, once the legs are done. That way you still get a nice roasted flavor on the whole goose, and you get crispy skin and you get properly pink breast meat. It’s really a more civilized way to eat the Lord of the Marsh. Because you are cooking the goose at a relatively low temperature, you also won’t smoke up your kitchen. Adapted from Simply Recipes interview with Hank.
Ingredients
Method
To start, if the goose has been refrigerated, bring it to room temperature before cooking. Keep it in its plastic wrapping until you are ready to cook it. While in the refrigerator, and or while you are bringing it to room temp, have the bird resting in a pan, so that if the plastic covering leaks for any reason, you are confining the juices to the pan. If you get a frozen goose, which is most likely the case, you will need to defrost it in the refrigerator for two days first.
While I have never found any instances of food poisoning from raw duck or goose, it’s best to handle the goose with common sense. Use a separate cutting board and utensils to avoid contaminating other foods. Wash your hands with soap frequently – if for no other reason than because geese are fatty and you don’t want to be walking around with greasy hands. Use paper towels to clean up.
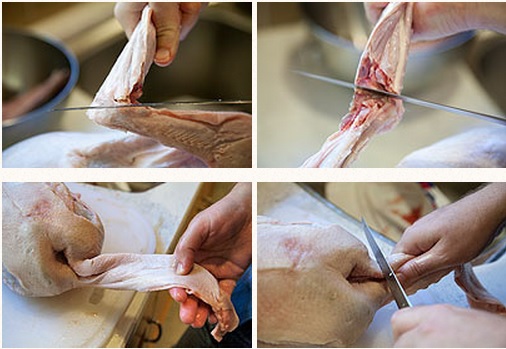
Remove the neck, giblets, and wing tips
Remove the neck and giblets (heart, gizzard, liver). Use them for making the gravy. You want to remove the last two joints of the wings, too, and use them for the gravy as well.
To do this, use a thin sharp knife – a boning knife is ideal, or you could use a paring knife or fillet knife – and cut across the side of the joint, severing the tendons. Bend the joint the opposite way it is supposed to go to break it. Cut the remaining skin and tendons. You should not need to cut bone at all.
- 1 goose, approx. 8 lbs.
- Juice of a lemon
- Salt and pepper
- 1/2 yellow onion, peeled and chopped
- 1 head garlic
- 1/2 cup Madeira wine
- 2 tablespoons flour
- 2 cups chicken stock (for gravy)
- 1 teaspoon dried thyme
- Root vegetables to roast with the goose, such as carrots, parsnips, turnips, potatoes, and/or rutabagas, peeled and chopped into large chunks
Method
To start, if the goose has been refrigerated, bring it to room temperature before cooking. Keep it in its plastic wrapping until you are ready to cook it. While in the refrigerator, and or while you are bringing it to room temp, have the bird resting in a pan, so that if the plastic covering leaks for any reason, you are confining the juices to the pan. If you get a frozen goose, which is most likely the case, you will need to defrost it in the refrigerator for two days first.
While I have never found any instances of food poisoning from raw duck or goose, it’s best to handle the goose with common sense. Use a separate cutting board and utensils to avoid contaminating other foods. Wash your hands with soap frequently – if for no other reason than because geese are fatty and you don’t want to be walking around with greasy hands. Use paper towels to clean up.
Remove the neck, giblets, and wing tips
Remove the neck and giblets (heart, gizzard, liver). Use them for making the gravy. You want to remove the last two joints of the wings, too, and use them for the gravy as well.
To do this, use a thin sharp knife – a boning knife is ideal, or you could use a paring knife or fillet knife – and cut across the side of the joint, severing the tendons. Bend the joint the opposite way it is supposed to go to break it. Cut the remaining skin and tendons. You should not need to cut bone at all.
Slice off the neck skin about a half inch in front of the body.
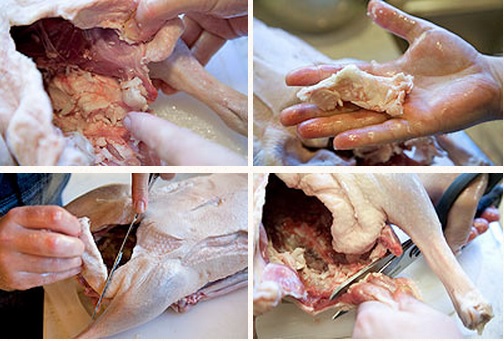
Remove the excess fat
You also need to remove excess fat from the goose. You will want to save it – goose fat is among the most delicious of all cooking fats, and it is far healthier than butter or lard.
Remove the excess fat
You also need to remove excess fat from the goose. You will want to save it – goose fat is among the most delicious of all cooking fats, and it is far healthier than butter or lard.
First grab the fat inside the body cavity and put it in a bowl. Now slice off the wide belly flaps covering the body cavity; if you plan on stuffing the goose you’d need these, but we’re not, so out they go. You also want to remove the Pope’s nose, which is the goose’s tail. All of this should go into a pot with a little water (about ½ cup) and put over low heat to render out.
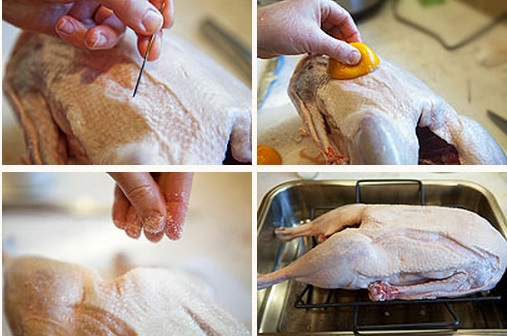
Prick the goose's skin all over with a sharp poking device
You still need to give all that fat underneath the goose’s skin somewhere to go – if you don’t, the skin will never fully crisp up. I’ve found the best way to do this is to prick it with a clean needle. The technique is to stick the skin from an angle so you are not piercing the meat of the goose, just the skin. Do this all over the goose.
Season the goose and place it in the oven
Rub the goose all over with the cut half of a lemon. Use both sides to get it good and coated. Put the halves inside the goose. Sprinkle salt liberally all over the goose. Use more salt than you think you need; it helps crisp the skin and adds a lot to the flavor.
Slice off the top of a head of garlic and place it inside the goose.
Place the goose breast side up on a rack in a roasting pan and into the oven.
Add some root vegetables to your roasting pan
After the goose has cooked for 20 minutes, add any chunks of root veggies you might feel like using. I like a mix of potatoes, turnips, carrots and parsnips. Here’s a tip: Toss them in some rendered goose fat and salt them before placing in the bottom of the roasting pan.
You can also use this time as an opportunity to spoon out some of the goose fat that may be collecting in the bottom of the roasting pan. Put it in the pot with the rendering goose fat.
When you’re done, put the goose back into the oven for another 25 minutes.
Carve out the breasts
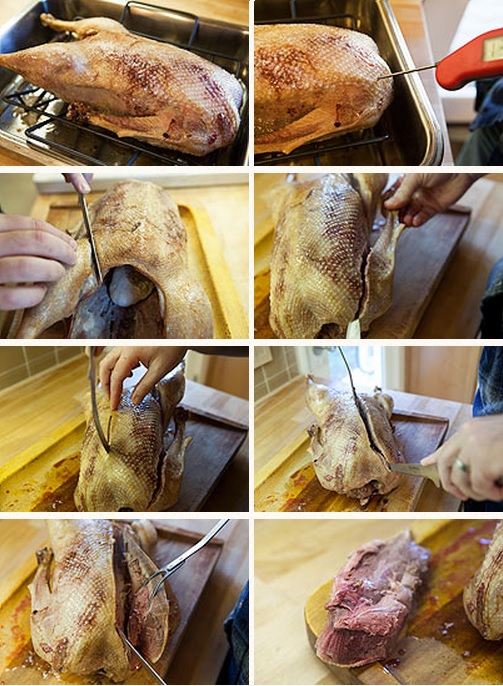
When a total of 45 minutes of cooking time has elapsed, test the temperature of the breast. You should have something between 130 and 140 degrees. If you’re there, remove the goose but keep the oven on.
Now you need to carve off the whole breasts. Using a thin knife – again, a boning knife is ideal – slice along the keel bone, which separates the two halves of the breast. Go straight down and tap the point of the blade against the breastbone as you move the knife up toward the wishbone, then back toward the open body cavity. Know that a goose has a deep keel and that the breastbone comes out wide at almost a right angle from it, so work your knife in short, gentle strokes out to free the whole side of the breast. Once you get near the wishbone, find it with the tip of your knife and carefully slice around it. Repeat on the other side.
Remove the breasts and tent with foil.
Finish cooking the remainder of the whole goose
Put the goose (minus the breasts) back into the oven. Let this cook for another 45 minutes.
After the additional 45 minutes are up, probe the thickest part of the goose’s thigh with a thermometer. You want 165-175 degrees. If it is a little low or high, that’s fine. Remove the goose. Check the root veggies, and if they are done, great. If not, keep them in the oven for the moment.
Remove the garlic from the goose. Tent the goose with foil and set aside.
Sear the breasts
Now get a large sauté pan hot. Add some goose fat, and let that get hot over medium-high heat. Take the goose breasts, which should be a lovely pink on the meat side, and pat them dry. Place them skin side down in the pan and sear the skin hard. You might need to press down on them a little to get good contact. Check after 3-4 minutes. You want a rich brown.When it is ready, remove the breasts – don’t cook them on the meat side! – and immediately salt the skin. Set aside, skin side up. Move the pan off the heat.
Carve off the legs and wings, then sear
Carve off the legs and wings of the goose. Get the pan hot again and sear the skin surfaces of the legs and wings. While this is searing, slice the breast (at an angle is nice) skin side up. Salt the legs and wings and serve with the root veggies.
You can also find this recipe in Hanks book, "Duck, Duck, Goose"
.
Simple Whole Roasted Duck
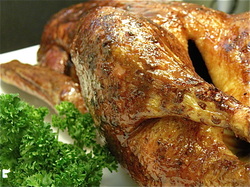
Prep time: 10 minutes Cook time: 2 hours Serves: 2-3
- Preheat oven to 320°F.
- Always thaw your duck thoroughly before cooking.
- If you're roasting one of my ducks, I have already removed the tail and vent fat - this reduces the amount of fat that will render during cooking.
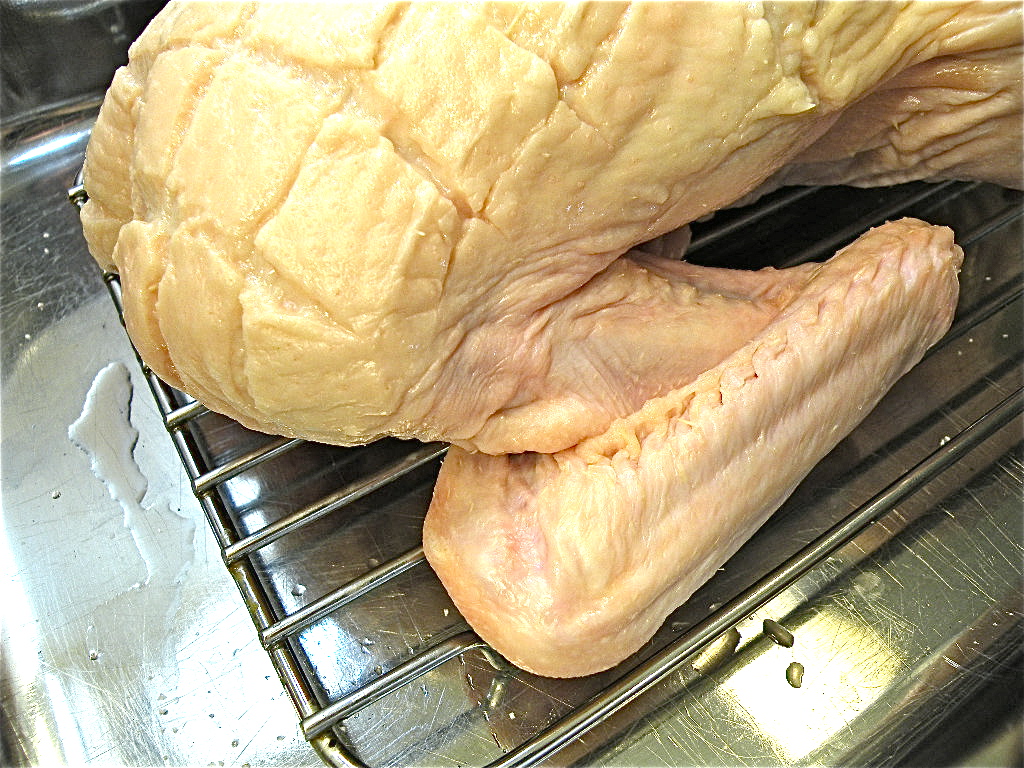
- Score the skin of the duck's breast and belly and prick the rest of the skin all over with a sharp knife. This is to create small holes that’ll let the fat escape more readily. The more fat escapes, the crisper the skin will be. Only prick the skin, don’t hit the meat.
- Season with salt & pepper.
|
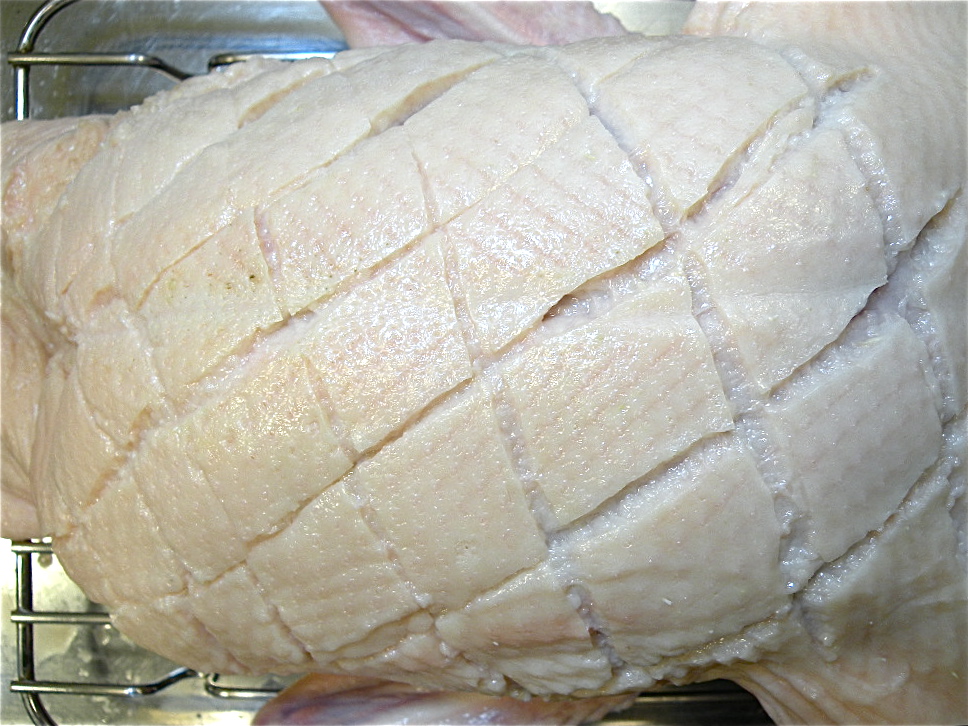
1. With a very sharp knife, score a diamond pattern into the duck skin on the breast. Slice carefully. You want to cut on an angle through most of the fat without cutting into the meat.
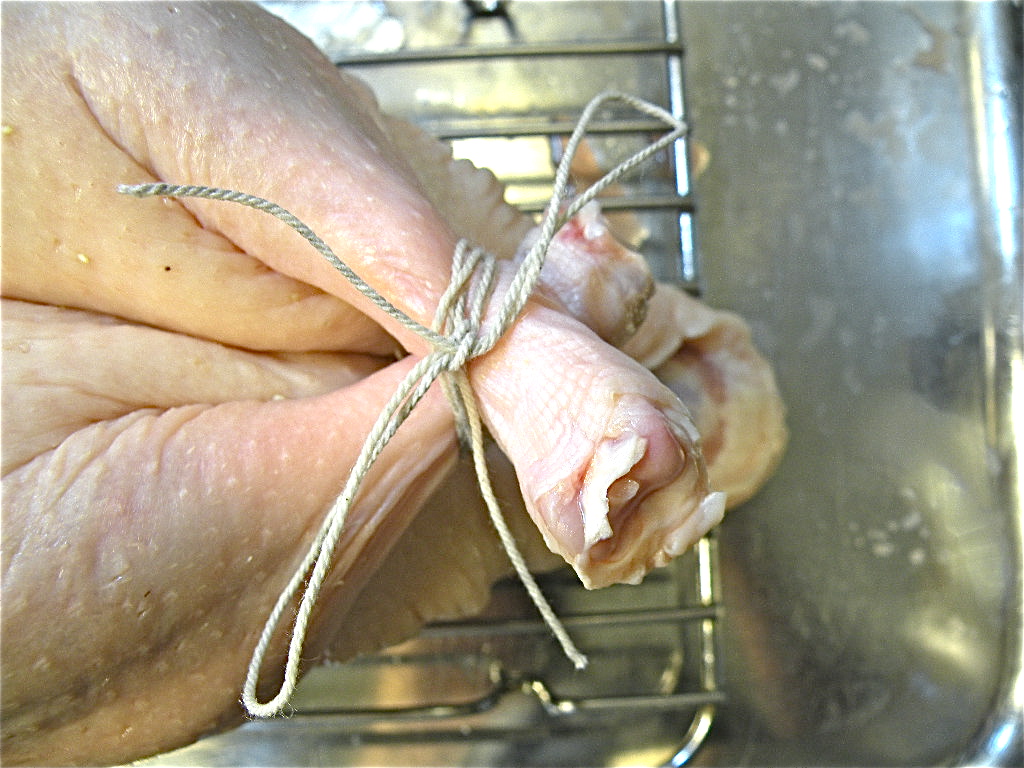
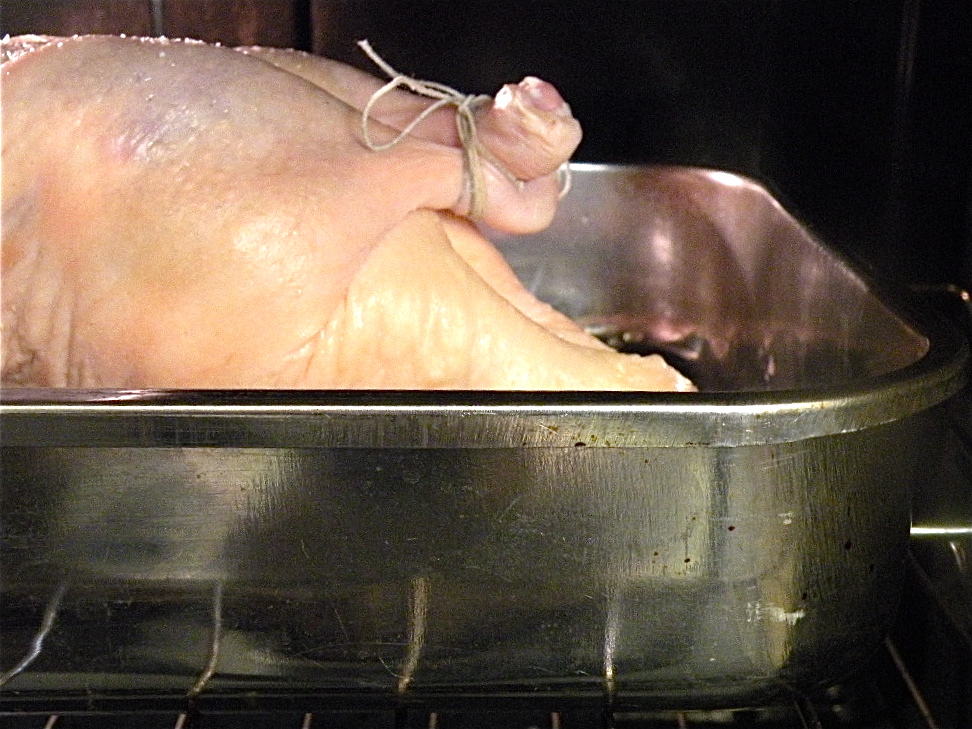
. 3. Cross the legs and tie them together like this with a piece of butcher’s twine. I typically truss the ducks prior to packaging them so you can skip this step if yours is done.
|
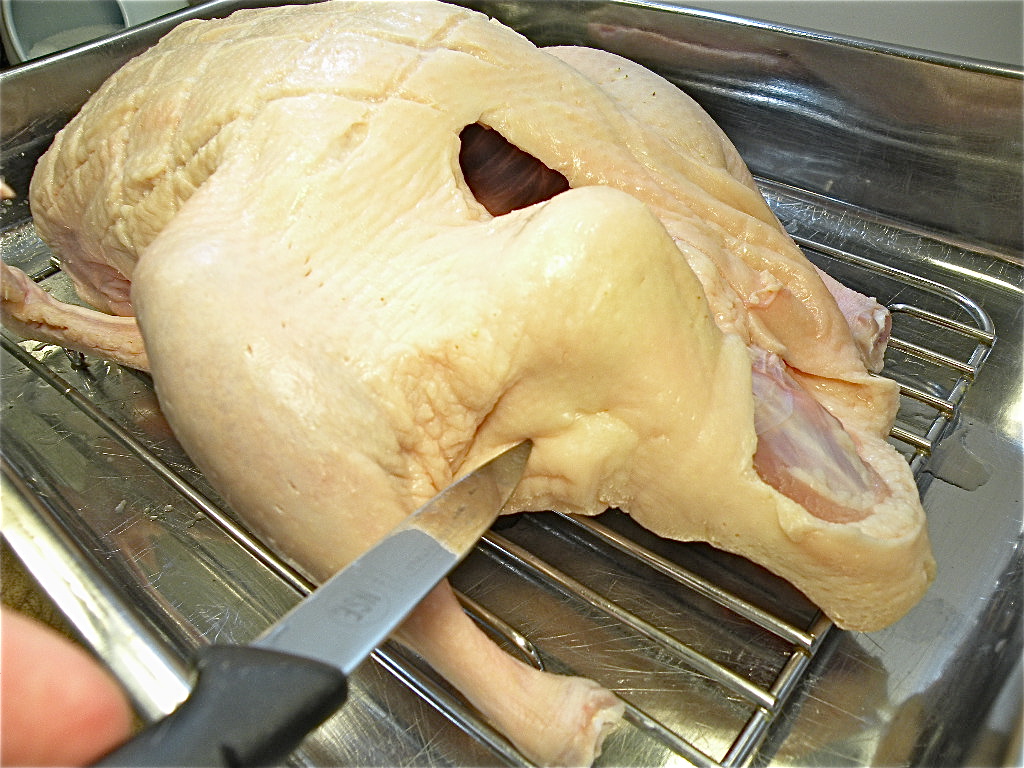
2. Prick the duck’s skin all over with a sharp knife. This is to create small holes that’ll let the fat escape more readily. The more fat escapes, the crisper the skin will be. Only prick the skin, don’t hit the meat.
4. Fold the wings under the duck (below is a more detailed view of the wing tuck).
|
|
5. Sprinkle the duck with salt and pop it into the oven. Roast like this, breast-side up, for about 50 minutes at 320.
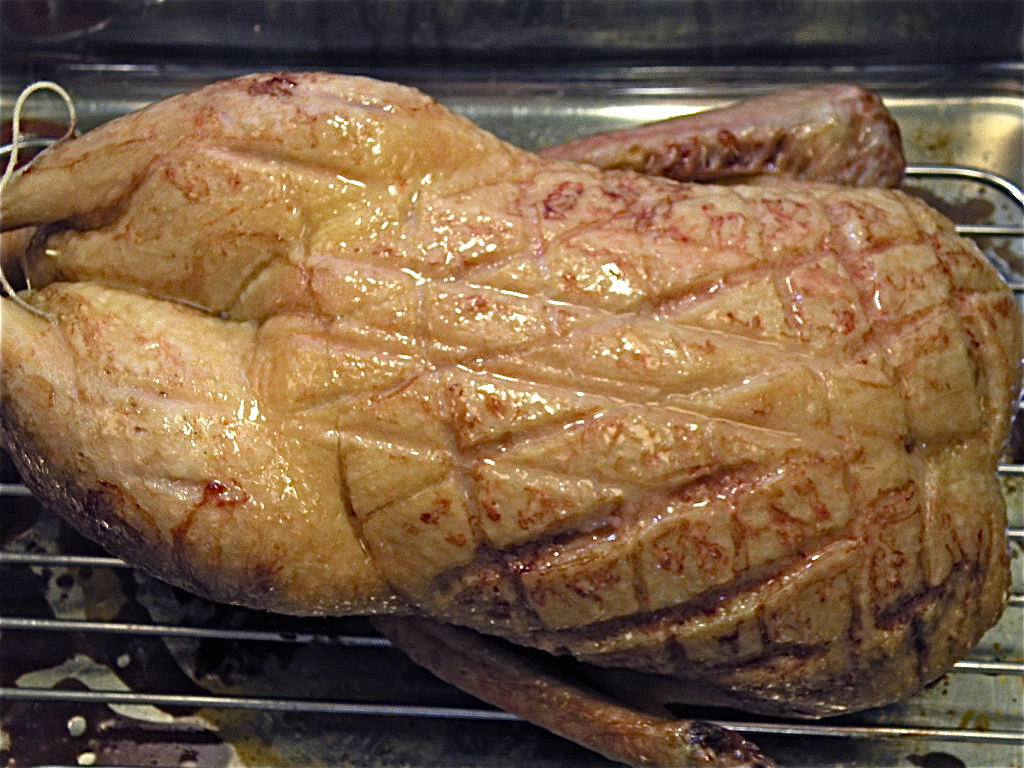
7. Take the bird out and heat your oven to 400. If you've prepared a glaze for the duck (such as Hanks Apriocot-Port Wine Glaze), this is the time to slather it on. Prick the skin all over. Flip the bird breast-side up and bake for about 10 minutes at 400 to crisp up the skin.
|
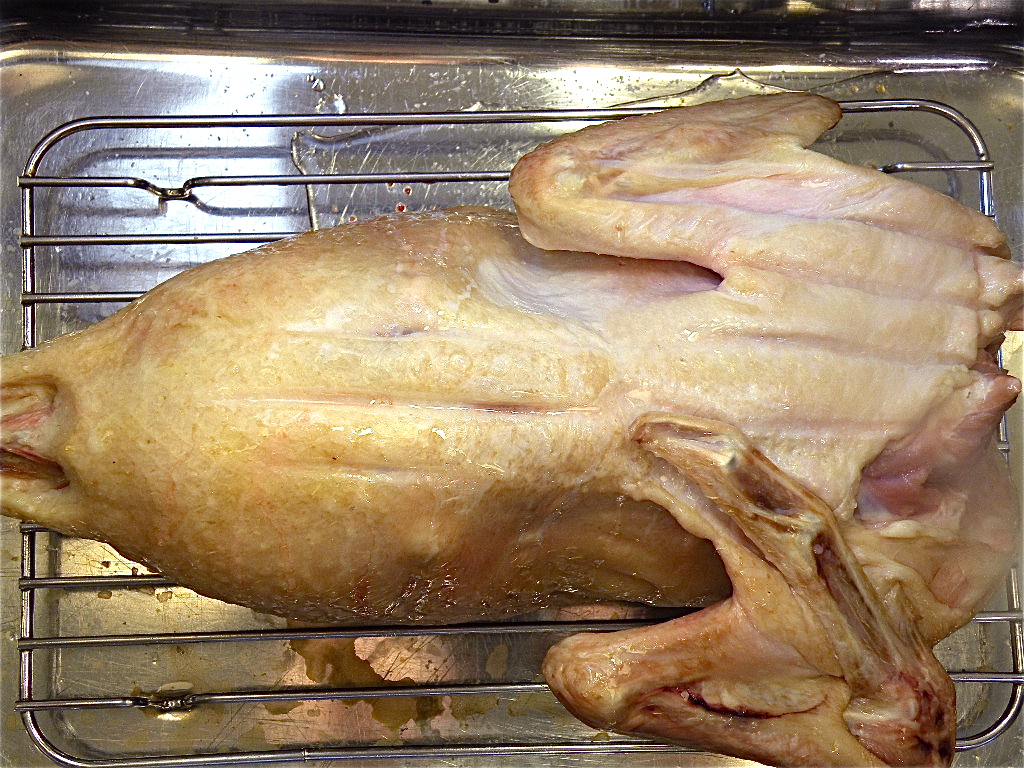
6. Flip the bird over, so it’s breast-side down and pop it back into the oven for about 50 minutes at 320 ..
8. Transfer your duck to a platter and carve just like you would a roasted chicken..
. . |
Mom and Pops' Red Roast Duck with Scallion Pancakes
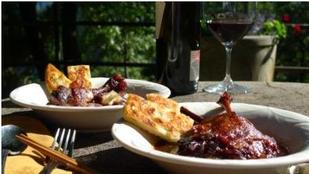
From Simply Ming Episode 910-Cooking on the Fly: Pressure Cookers Serves 4
Ingredients:
2 tablespoons canola oil
1 bunch scallions, green and white parts, cut into 1-inch lengths
3 cloves garlic, peeled
2 tablespoons minced ginger
6 duck legs
5 fluid ounces soy sauce, to taste
1 bottle red wine
1 14-ounce bag (about 1 cup) rock candy
2 cinnamon sticks
4 star anise
1 Thai bird chili
Scallion Pancakes
2 cups all-purpose flour, plus more for kneading
1 cup (8 ounces) hot water
1 bunch scallions, thinly sliced
Kosher salt
Canola oil for cooking
Directions 1. Heat canola oil in pressure cooker on the stove over medium heat. Add scallions, garlic and ginger. Cook 2 minutes. Add duck legs and continue to cook, stirring, for 2 to 3 more minutes. Add red wine, soy sauce, rock candy, cinnamon sticks, star anise and chili. Bring to a simmer. Add enough water to cover duck.
2. Bring to a simmer then taste and adjust seasoning. Add enough water to cover duck. Place lid on pressure cooker and set on setting 2. Cook 30 minutes.
3. To make Scallion Pancakes: Mix flour with water to form a shaggy mass then transfer to a floured surface. Knead, gradually adding more flour, to form a stiff dough. Shape dough into a disk. (Alternatively, place flour in a stand mixer fitted with a dough hook at medium speed and gradually add water. Once dough forms a ball and all dry ingredients are incorporated, remove from mixer. Dough should not be sticky, if it is add more flour, tablespoon by tablespoon. Very lightly flour a flat surface and bring dough together into a disk.) Wrap tightly with plastic wrap and chill refrigerator for at least an hour or up to 48 hours. Divide dough into 3 or 4 smaller pieces and roll out to 1/8-inch thickness. Brush with oil and sprinkle with salt. Spread scallions over dough and roll up jelly roll fashion to form a tight log. Twist each end of the log in opposite directions 4 or 5 times (this will make additional pancake layers), then wrap the log around itself to make a coil, tucking the outside end beneath the coil. Flatten the coil with a rolling pin and roll out to 1/4-inch thick. Heat canola oil in saute pan over medium heat and swirl to coat. Add pancake, one at a time, and cook until golden brown and crispy on both sides, turning once, 2 to 3 minutes per side.
4. Depressurize pot by releasing valve or placing under cold running water and remove lid. To serve family style: Transfer duck legs to a large wide bowl and pour sauce over top. Serve with scallion pancakes on the side.
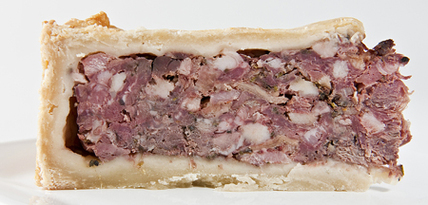
Duck Pie
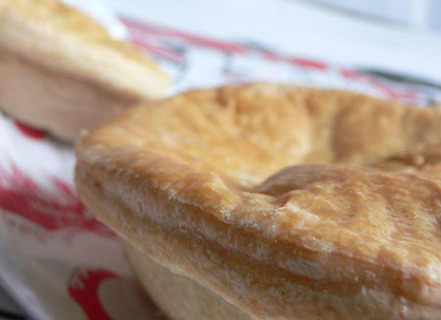
From Hank Shaw. Serves 8-12
This is an absolute meat bomb of a pie. Based on Hugh Fearnley-Whittingstall’s English Pork Pie recipe in his book The River Cottage Meat Book, Hank has adapted it with his own spices — and lots and lots of duck. This recipe is time-consuming; but many steps can be done days in advance, and when you're finished, this pie will keep in the fridge for up to three weeks. There is one piece of special equipment you need to make this pie: an 8- or 10-inch springform pan.
CRUST
4 1/4 cup all-purpose flour
1 1/2 teaspoons salt
7 tablespoons lard
7 tablespoons butter or duck fat
1 cup warm water
1 egg, beaten
Cornbread Meat Pie Topping
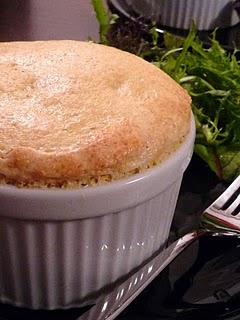
A fabulous shortcut to making meat pies - cornbread crust!
No messy rolling or shaping of pastry required. Simply mix flour, cornmeal, salt and baking powder together, then combine buttermilk and egg white and add to dry mixture. Simply stir everything together and spoon evenly over meat filling before baking in oven... its quick & easy!
Ingredients
3/4 cup cornmeal
1/4 cup all-purpose flour
1 1/2 teaspoons baking powder
1/2 teaspoon salt
1/2 cup buttermilk
1 large egg
2 tablespoons bacon grease (or rendered duck fat)
Combine the cornmeal, flour, baking powder, and salt in a mixing bowl.
Beat together the buttermilk, egg and bacon grease in a small mixing bowl. Add to the dry ingredients and mix until just blended, being careful not to overmix. Use as a topping for your meat pie.
Duck Buffalo Wings
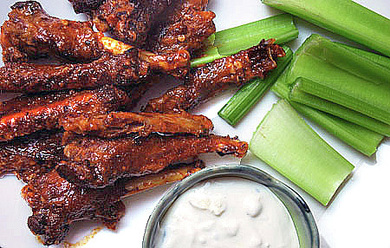
From Hank Shaw, Hunter Angler Gardner Cook:
The folks in Buffalo, NY, who invented the Buffalo Wing, weren’t stupid, and applying the same basic idea to duck wings works — if you understand they will not just fall off the bone. Here’s how to do it:
Ingredients:
24-48 duck wings, separated into sections
1 quart duck stock
2 bay leaves
1 small bottle Tabasco Sauce
2 tablespoons mild paprika
4 tablespoons olive oil
1 teaspoon salt
1 teaspoon chile paste (optional)
Directions:
- In a large Dutch oven or covered pot, submerge the duck wings in the stock; add water if needed to cover by about 1/2 inch. Toss in the bay leaves, cover and put in a 325-degree oven. Cook for at least an hour, maybe 2 — you want the wings to be nearing the “falling off the bone” point.
- Remove and drain. Pour the Tabasco sauce, paprika, olive oil, salt and chile paste into a container large enough to hold all the wings. Stir well to combine and add the wings. Toss well to coat them all.
- Let this marinate for at least an hour, and as long as overnight. The longer you marinate, the hotter the wings will be.
- Preheat oven to 375 degrees.
- Place the wings on a cookie sheet or two in a single layer and bake until they are crispy, between 30-45 minutes. Start watching them after 30 minutes to see that they get to the crispiness you want.
- While the wings are cooking, pour the marinade into a small pot and bring to a boil. Keep warm, and when the wings are done, toss them with the warm sauce right before serving.
- Serve with your favorite blue cheese sauce with some celery. Oh yeah, and a beer
Love this? Check out Hanks cookbook: Hunt Gather Cook
Tea Smoked Duck & Roasted Apple
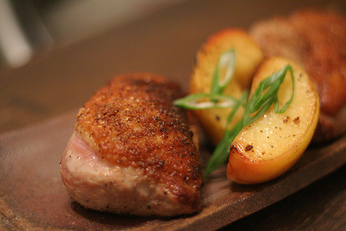
Very simple and straightforward for the the creative cook:
- Smoke your duck with a mixture of wuyi oolong, brown sugar & rice.
- Create your crust with Szechuan peppercorns, cumin, chili flakes, pepper, salt.
- Pan-roast with quartered Fuji apples.
Alton Brown Mighty Duck
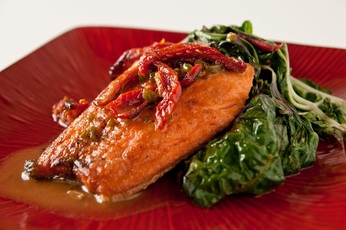
Yield: 2 to 4 servings
Ingredients
Brine:
1/2 cup kosher salt
1 pint pineapple orange juice
15 whole black peppercorns
1 bunch fresh thyme
4 cloves garlic, smashed
1 (5 1/2 to 6 pound) Duck, quartered
2 handfuls shredded chard
2 shallots, minced
Dash sherry or balsamic vinegar
Directions
Combine all brine ingredients in a plastic container with a lid. Place the lid on the container and shake to dissolve the salt.
Remove the pop-up thermometer, liver, gizzards, and heart. Cut off the wings.
Using kitchen shears, locate the spine at the base of the neck. Cut up the line of the backbone towards the neck cavity. Turn the duck and cut straight towards the rear cavity. Remove the backbone.
Turn the duck over and cut straight down the middle of the breast bone, leaving 2 equal duck halves. To separate the legs from the breast, flip your halves over so the flesh side is facing up at you. Using a knife, make a crescent shape cut between the leg and the breast. Lay your knife flat against the skin and make 3 marks in one direction and then in the other, making an X. Make sure that you are cutting through the skin and not the meat.
Line the inside of a plastic lexan or a pot with a zip-top bag. Place the duck quarters inside the bag, and pour the brine over the duck. Seal the bag, ensuring that all air is removed from the bag. Brine the duck for 2 to 2 1/2 hours in the refrigerator.
Bring 1 1/2 inches to 2 inches of water to a boil in a large pot. Place a colander into the pot and line the sides of the colander with the duck. Do not stack the duck quarters on each other. Cover and turn the heat to medium low. Steam the duck for 45 minutes. Set oven to 475 degrees F. Place a large cast iron skillet into the oven.
Remove duck pieces from steamer and place legs, skin side down, into the hot skillet. Place the skillet into the hot oven immediately and cook the leg quarters for 10 minutes. Add the breasts, skin side down, and cook for 7 more minutes or until the duck takes on a deep mahogany color and the skin is very crisp.
Remove the duck from the skillet and rest under foil. Add the chard and the shallots to the skillet. Toss the chard in the fat until it barely wilts. Season with the sherry or balsamic vinegar.
Serve the duck with the chard.
Recipe courtesy Alton Brown
Duck or Goose Demi-Glace
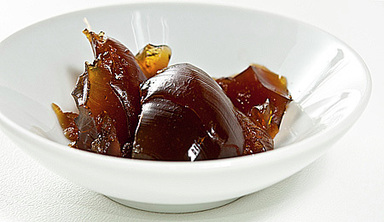
From Hank Shaw, Hunter Anger Gardner Cook:
Demi-glace is an ultra-concentrated sauce base that I use to enliven pan sauces or soups; it’s usually made with veal. Demi-glace is also the closest thing I know to making your own bouillon cubes — only this is infinitely better. Looks like duck Jell-O, doesn’t it?
The only problem with demi-glace is that is a major pain to make. If you have other things to do, this recipe can take several days. Really. But it’s still worth it. Take your time and go with it. Once its made, demi-glace will last two weeks or more in the fridge and a year in the freezer. Freeze it in blocks with an ice cube tray, or in small glass jars. Remember a little goes a long way. Then, when you need a bomb of meaty flavor, grab some demi-glace and drop it into the sauce or soup.
If you make this with domestic ducks or geese, cut as much fat off them as you can, and note that you will only need 3-4 duck carcasses or 2-3 goose carcasses.
Makes 1-2 pints demi-glace
Ingredients:
6-10 wild duck or 3-4 wild goose carcasses, with some meat still attached (like wings and necks)
20-30 duck feet, or 1 pig’s foot
A little olive oil
Kosher salt
2 chopped onions
4 chopped carrots
5 chopped celery sticks
Stems from 1 bunch parsley
Large sprig of fresh thyme or 1 tablespoon dried
Large sprig rosemary or 1 tablespoon dried
1 tablespoon cracked black pepper
4 bay leaves
4 garlic cloves, peeled and smashed
1 tablespoon crushed juniper berries (optional)
Directions:
Love this? Check out Hanks cookbook: Hunt Gather Cook
Demi-glace is an ultra-concentrated sauce base that I use to enliven pan sauces or soups; it’s usually made with veal. Demi-glace is also the closest thing I know to making your own bouillon cubes — only this is infinitely better. Looks like duck Jell-O, doesn’t it?
The only problem with demi-glace is that is a major pain to make. If you have other things to do, this recipe can take several days. Really. But it’s still worth it. Take your time and go with it. Once its made, demi-glace will last two weeks or more in the fridge and a year in the freezer. Freeze it in blocks with an ice cube tray, or in small glass jars. Remember a little goes a long way. Then, when you need a bomb of meaty flavor, grab some demi-glace and drop it into the sauce or soup.
If you make this with domestic ducks or geese, cut as much fat off them as you can, and note that you will only need 3-4 duck carcasses or 2-3 goose carcasses.
Makes 1-2 pints demi-glace
Ingredients:
6-10 wild duck or 3-4 wild goose carcasses, with some meat still attached (like wings and necks)
20-30 duck feet, or 1 pig’s foot
A little olive oil
Kosher salt
2 chopped onions
4 chopped carrots
5 chopped celery sticks
Stems from 1 bunch parsley
Large sprig of fresh thyme or 1 tablespoon dried
Large sprig rosemary or 1 tablespoon dried
1 tablespoon cracked black pepper
4 bay leaves
4 garlic cloves, peeled and smashed
1 tablespoon crushed juniper berries (optional)
Directions:
- Coat the duck carcasses with the olive oil and salt well. Set aside for 15 minutes while you heat the oven to 400 degrees. Alternatively, grill the duck carcasses over high heat until well browned. If you are roasting, put the duck or goose carcasses in a large roasting pan and cook at 400 degrees for 30-45 minutes, or until well browned.
- Meanwhile, chop the duck feet with a cleaver or heavy chef’s knife, or score the pig’s foot all over. This opens the feet up to the broth, so all that collagen can get into it. This is what makes the concentrated broth set up solid. Do not skip the feet!
- Once the carcasses are roasted, remove and chop them into large pieces with poultry shears or a large chef’s knife or cleaver. You’re doing this to be able to fit them all into your stockpot. Stuff the duck carcasses into your largest stockpot and cover by 1-2 inches with cold water. Add the feet to the pot.
- Bring the stock to a bare simmer – do not let it boil – and skim any froth that surfaces. Do this as many times as needed. Simmer the stock for 4-8 hours. You can stop now if you’d like and pick up the process the next day.
- Once the stock has simmered for 4-6 hours, add all the vegetables, herbs and spices. Simmer this for 90 minutes to 2 hours — no longer.
- Strain the stock. First pull all the bones and things out with tongs, then use a Chinese spider strainer or slotted spoon to fish out the smaller bits. Finally, pour the stock through a fine-mesh sieve lined with cheesecloth (or a paper towel) into another large pot. You might need more than one pot. This is another place where you can stop and pick up the process later.
- Once you have your finished stock, you should have something on the order of 2 gallons. Now a normal demi-glace recipe would have you split the stock and make a sauce espagnol out of one half, then combine it with the other half after you’ve already added some more herbs and aromatic things. I see no reason to do this. Instead, move the pot off-center to a burner set on low heat: This will concentrate the impurities you will need to skim off all on one side of the pot. Skim frequently.
- Let this simmer down for at least 6 hours. I usually have started this whole process in the morning, and by evening have my nice stock. This final reduction process I let go on overnight. In the end, you should have a clear, thick broth. Pour this into small containers, and refrigerate. It should set up and become a gelatin.
Love this? Check out Hanks cookbook: Hunt Gather Cook
Split Pea and Smoked Duck Soup
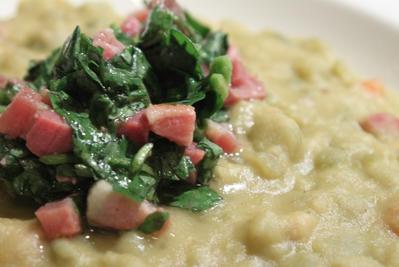
Yield: 3-4 servings
Ingredients:
1/2 pound of smoked duck breast, skin on
1/2 cup finely diced Italian pancetta
1 small onion, minced
1 carrot, coarsely chopped
1 bay leaf
1 pound dried split peas
4 cups chicken broth
Kosher salt and freshly ground black pepper to taste
1 teaspoon lemon juice
1 tablespoon olive oil
1/2 shallot, finely diced
1/4 cup heavy cream
2 cups minced watercress
Directions:
adapted Molly O’Neill recipe featured in The New York Times
Ingredients:
1/2 pound of smoked duck breast, skin on
1/2 cup finely diced Italian pancetta
1 small onion, minced
1 carrot, coarsely chopped
1 bay leaf
1 pound dried split peas
4 cups chicken broth
Kosher salt and freshly ground black pepper to taste
1 teaspoon lemon juice
1 tablespoon olive oil
1/2 shallot, finely diced
1/4 cup heavy cream
2 cups minced watercress
Directions:
- Cut the smoked duck into a fine dice and place it, skin side down, in a heavy-bottom casserole or stockpot over medium heat along with the pancetta.
- Cook for 3 minutes to release the fat from the meat, stir and continue cooking for 5 minutes. Remove half the meat, drain well and set aside on a plate lined with a paper towel.
- Add the onion and carrots, stir and cook until the vegetables begin to soften, about 3 minutes.
- Add the bay leaf, the split peas and the chicken broth, stir, partly cover and simmer for 40 minutes to 1 hour until the peas are tender.
- Adjust the consistency of the soup with more chicken broth if necessary to achieve a thick, but still soupy, consistency.
- Adjust the seasoning with salt and freshly ground black pepper to taste. The soup can be made to this point up to one day before serving.
- A half-hour before serving, warm the soup. Place the lemon juice in a bowl with a dash of salt and several grinds of black pepper. Slowly whisk in the olive oil. Add the shallot, reserved duck and pancetta and toss. Add the watercress and set aside.
- When the soup is hot, stir in the heavy cream, quickly and vigorously. You want to completely enrich the soup while smashing as few peas as possible. (I let my peas get all smashed up since that’s how I like it.) Serve garnished generously with the duck and watercress salad.
adapted Molly O’Neill recipe featured in The New York Times
Asian Duck Salad

Yield: 6 Servings
Ingredients:
Vinaigrette:
!/4 Cup Vegetable Oil
1 Tbsp Roasted Garlic Oil
1 tsp Sesame Oil
1/4 Cup Rice Wine Vinegar
1 tsp each: Basil, Chives, Fresh Ginger, minced
1/4 Jalapeno Pepper, seeds removed, minced
1 tsp each: Sugar, Salt
1 1/2 tsp Soy Sauce
Marinade:
1 1/2 cloves Garlic, minced
1 Tbsp Fresh Ginger, minced
2 Tbsp Vegetable Oil
3/4 tsp Sesame Oil
5 tsp Soy Sauce
3/4 tsp Chinese Five Spice Powder
6- 6 oz each Maple Leaf Farms Boneless Duck Breasts
Salad:
9 oz Mesclun Greens
5 Tbsp Cilantro, rough chop
18 Tomato Petals
Stir Fry:
Vegetable Oil as needed
3 Cups Napa Cabbage, rough chop
1 1/2 Cups Bean Sprouts
6 Tbsp Green Onions, sliced
1 Tbsp Soy Sauce
5 Tbsp Roasted Peanuts, chopped
Directions:
- Combine vinaigrette ingredients. Refrigerate, covered, for 8 hours.
- Combine marinade ingredients. Remove skin from duck breasts; add duck breasts to marinade. Marinate, covered, in refrigerator for 12-24 hours.
- Remove duck from marinade; discard marinade Season duck with salt and pepper. In hot skillet, sear duck on both sides. Finish cooking in 350 degree oven until internal temperature reaches 155 degrees. Let breasts rest. Slice each breast into 9 slices; keep warm.
- Combine mesclun and cilantro. Toss with vinaigrette to taste. Divide evenly among 6 plates. Toss tomato petals in vinaigrette. Place 3 petals evenly around each plate.
- Stir-fry vegetables with soy sauce in hot oil until sprouts begin to soften. Place mixture in 3 small mounds around mesclun and in between tomato petals. Place 3 slices of duck on each mound. Garnish with peanuts.
Goose Prosciutto
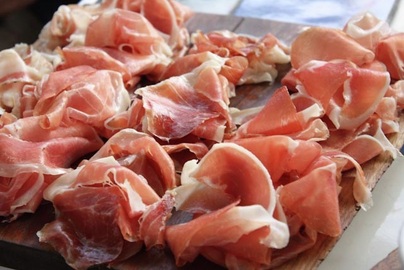
Here are two recipes and instructions from Hank Shaw (my hero): One for a “sweet” cure, the other for spicy:
This is what I do when I want to make Italian-style goose prosciutto: You can mess around with the spices as you wish, but until you do this a few times, don’t change the amount of salt and sugar.
The sweet cure needs watching as it dries — it is more prone to mold than the spicy variety. Remember that white, powdery mold is OK, white fuzzy is not harmful but should be wiped off, green fuzzy needs to be wiped off the moment you spot it, and black mold is bad: You might want to toss the breast if you get the black stuff. When I get it, I wipe off the mold every other day with a paper towel soaked in red wine vinegar.
How long to cure? From 2-6 weeks, depending on the size of the breasts and the amount of fat and the temperature and the humidity. Suffice to say you need to watch it every other day or so.
Once the goose prosciutto is cured, you can eat it straight away or wrap it and store it in the fridge. It also freezes well for a year or more.
SWEET GOOSE PROSCIUTTO
1 goose or domestic duck breast, both halves (skin on)
3/4 cup Kosher or pickling salt
1/4 cup sugar
2 tablespoons garlic powder
1 tablespoon ground fennel seed
1 tablespoon ground white pepper
1/2 teaspoon ground clove
1/2 teaspoon grated nutmeg
SPICY GOOSE PROSCIUTTO
1 goose or domestic duck breast, both halves (skin on)
3/4 cup Kosher or pickling salt
1/4 cup sugar
2 tablespoons garlic powder
1 tablespoon mild paprika
1 tablespoon red pepper flakes
1 tablespoon dried, crumbled oregano
1 tablespoon ground black pepper
- First a note on the meat. When you breast out the bird, leave as much skin and fat on it as possible; you’ll get these “tails” of skin on both the tail and neck end of the bird if you do, and this is what you want: They will come in handy later.
- If you haven’t already, peel off the “tender” on the meat side of the breast. Deep-fry in batter and enjoy!
- Mix all the spices together in a large bowl.
- Coat the goose or duck breasts in the mixture well. Massage it into the meat, and make sure every bit of it has cure on it.
- Pour any extra cure into a non-reactive container just about large enough to hold the goose breasts. I use tupperware. Place the goose breasts on top and cover.
- Cure in the fridge for 1-3 days. The longer you cure, the saltier the prosciutto will be. The saltier it will be, the longer it will keep — but the thinner you will need to shave it when you eat it. A Ross’s goose or an Aleutian or Cackler needs only a day. I give domestic ducks, snow geese or whitefront geese two days. A big Canada or a domestic will need three or even four days.
- Flip the breast once a day to ensure even contact with the extra cure.
- When it’s done, rinse off the cure and dry the breasts thoroughly. A lot of people will tell you to rinse off every smidge of cure, but I don’t like this — I like the few remaining bits here or there. But you need to get most of it off, and it is imperative that you dry the goose breasts off after rinsing.
- Let the breasts dry on a rack, skin side down, for an hour or two.
- Now it’s time to hang them. You will need a humid place (60-80 percent humidity) that is between 40-65 degrees to hang your goose prosciutto. I keep my curing fridge at 70 percent humidity and 55 degrees. Poke a hole in one of the skin “tails” and either run an “S” hook through it or some string. Hang on a rack so it does not touch anything else for a few weeks.
- Eat with gusto.
Love this? Check out Hanks cookbook: Hunt Gather Cook


